Thursday 15 November 2012

Magical DIY blackhead removal

Hello darlings!

Quick story - so one day I looked in the mirror and to my HORROR I almost fainted to see blackheads on my poor little nose! I ran to the drawer for my trusty nose strips to find all gone! What was I going to do before a huge engagement that evening? Of course being a Pinterest freak, I immediately got on and looked up DIY blackhead removers and I found a couple of things with nutmeg. So, running out of time, I decided to whip up my own concoction (boy am I brave!). When I was done, I almost fainted once again, this time because EVERY SINGLE BLACKHEAD WAS COMPLETELY GONE! It was exactly like magic!

So, let's waste no more time and get rid of YOUR blackheads now! :)


You'll need:
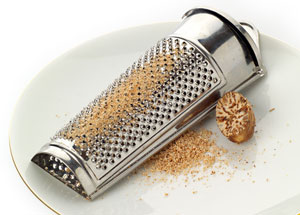
  • 1 tbsp grated nutmeg
  • 1/4 tsp milk
The magic is about to begin:
  • Start with a washed and dried clean face.
  • Combine nutmeg and milk in a small bowl. Mixture should be almost like a paste, just not as smooth because of the grated nutmeg.
  • Use the mixture on the face, gently scrubbing with the fingertips in small circles. You may do this only on the affected spots or the entire face if you wish (avoiding the eyes).
  • Massage for about 2 minutes and then rinse off with cool water. Remember, DO NOT scrub hard, you do not want to damage your skin, but gently exfoliate the blackheads.
  • After rinsing, pat dry and marvel at yourself in the mirror!
Now, do you believe in magic?

... Love and beauty, Virmala.

The powerful powdered milk DIY face mask

Hello darlings!

With the supermarket shelves being filled with tonnes of brands of ready to drink milk, we all probably forget at times, that powdered milk does exist! More interestingly, I'm also about to tell you that you can not only drink it, but...(dum dum dum) USE IT ON YOUR FACE (GASP!!). Yup, news flash - it is soo good for your skin. Remember flawless Cleopatra? She was specially known for her beautiful skin which as you can guess by now, was as a result of her milk baths. I dare you to try this and I promise you, you'll be sticking with this for a long time! (P.S: Perfect for a quick fix before a date.)


You'll need:
  • 2 tbsps powdered milk (instant)
  • 1 tbsp warm water
  • 1/2 tsp honey (optional)

Egyptian time:
  • Ensure your face is washed and dried clean. Clip your hair back because you DO NOT want milky sticky bangs!
  • In a small bowl, combine milk with water and and mix quickly. Add honey and check consistency - should be paste-like and smooth; if not, add more milk or water accordingly. Remember to mix out all the lumps.
  • Apply generously over face. 
  • However, if you're like me and always manage to have excess mixture, don't throw it away! Keep applying over and over until your bowl is empty. Layers will dry quickly and allow you to keep adding more on top of them.
  • Leave to dry for about 20-25 mins and then wash thoroughly. Pat dry.
  • You can do this about twice a week.

Beautiful glowing skin is only 25 mins away.

... Love and beauty, Virmala.

The "oh so infamous" OCM (Oil Cleansing Method)

Hello darlings!

Sooo, the OCM craze has taken over everywhere, from Pinterest to forwarded emails, and of course I had to try it! After about 2 weeks of intermittent use, I was satisfied with the results - glowing and smoother skin. However, I added my slight to twist to the procedure which totally improved the results and I am sure, you will also be pleasantly surprised after trying it out.

For those who may not be familiar with the OCM method, it's the use of oil to dissolve excess oil and remove impurities from the face. It may sound a bit twisted at first, because you ARE adding oil to a usually already oily type face (apparently my scientifically blessed boyfriend confirms the theory to me, a law student, that "like dissolves like" - meaning that oil dissolves oil) but I promise it will totally shock you! Remember to do this at night before bed and when you're just starting, try to use it every OTHER night. Now, there are a few combinations of oils but the recipe that I am giving works the best so far!


You'll need:
  • 3 tbsp extra virgin olive oil
  • 1 tbsp castor oil
  • Small bottle
  • Small towel
  • 1 tsp aloe vera gel

Let's begin the transformation:
  • Start with a clean, dry face. Pull your hair back with a band or clip.
  • Pour oils in bottle and shake well. (usually lasts 1-2 weeks)
  • Apply half of a dime sized amount all over the face and  neck. Massage well.
  • Soak the towel in warm water and squeeze slightly. Place over face for a few seconds, wash and repeat. 
  • Wipe the oil off with the warm towel after repeating the above steps 3 times.
  • Apply aloe vera gel over entire face and go to sleep!

Happy transformations!

... Love and beauty, Virmala.

Miracle DIY Hair Mask

Hello darlings!

In my extensive search for beauty tips and tricks over the past year, I have been discovering tonnes of new things that of course after trying every single one of them, I am happy to share the ones that actually work perfectly! However, I have been playing around with things you can find at home and of course PANTRY (the boo says I empty the house's food supply and grocery shop for my face and hair HA!) and have put together some really effective recipes for both hair and facial purposes!


Today, I must share my 4 part MIRACLE HAIR MASK (sitting here running my hands through my so-amazing-I-think-the hair-fairy-stopped-by-last-night hair!) and hope that you too can bask in the new found hair glory that's only an hour away! This mask is super excellent for dry, damaged and colour treated hair; or for a quick shine! Note that the order of application steps are crucial to the outcome of the mask, so relax and pamper yourself!


(This is actually what my hair looks like after the mask is washed off and hair, dried.)


You will need:
  • 1 tbsp coconut oil 
  • 1 tsp castor oil
  • 1 tbsp aloe vera gel (raw)
  • 1 tsp honey

It's magic time:
  • Start with dry hair (it does not matter whether it's clean, flat ironed or anything at all). 
  • Warm the coconut oil and distribute evenly throughout entire head. 
  • Massage castor oil with fingertips only at the roots (else you'll end up looking like a frizz ball, noooo!).
  • Apply aloe vera gel starting from the roots and end off completely saturating the ends of your hair.
  • Finally, coat as much of the hair as possible with the honey, which acts as a sealant to let the magic take place.
  • If you're in a rush, opt for a shower cap or plastic wrap and keep the mask on for an hour and rinse with shampoo and warm water, and end off with a good conditioner and a cold rinse.
  • However, if you want a deep conditioning, you can leave the mask on overnight, before your regular wash the next day. 

Here's hoping you too can enjoy the wonderful, smooth, soft and heavenly hair that I am currently being distracted by! 

... Love and beauty, Virmala